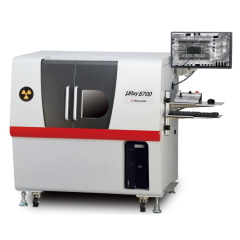
Foreign Matter Inspection and Its Inspection Method
Non-destructive inspection using X-rays can perform various inspections. The most widely used is the inspection to detect foreign substances mixed in. Let's introduce the procedure and features of foreign matter inspection using the manufacturing process as an example.
For example, food is manufactured for human consumption, so safety is the top priority. Of course, you need to do a 100% inspection. HACCP, a food safety standard, requires us to define how to prevent B (Biological pollution by microorganisms), C (Chemical substances), and P (Physical foreign matter). "P" indicates a foreign body that could be a physical hazard, including fragments of metal, plastic, glass, stone, wood, etc. In order to perform these detections by non-destructive inspection, it is possible to find chipped blades with a metal detector, but those that do not react to magnetism, such as plastic, can only be found by infrared or X-ray inspection.
Of course, non-destructive inspection by X-ray is also used in manufacturing processes other than food. Items in metal cases and cans can only be inspected by X-rays, and stones and the like do not react to metal detectors, so X-ray inspection is required to find them.
Not limited to food, infrared inspection is performed using "Fourier transform infrared spectrophotometer (FT-IR)". Foreign matter is detected by irradiating the sample with infrared rays and identifying the absorbed wavelength by Fourier analysis. In this case, it should be noted that the foreign matter is not detected as an image but is identified only by the infrared absorption line. For example, we can find the absorption of alcohol and water by using infrared rays. These can be used to identify liquids contained in PET bottles, etc. It can also be applied to baggage inspection at airports.
On the other hand, if it has a certain size other than the above, use an energy-dispersive X-ray analyzer. By imaging with this, we will search for and check for foreign matter that is similar in shape to the foreign matter that may be mixed. If metal fragments, bone fragments, hard parts of plant fibers, etc., are stored in a database, it is possible to automatically determine the contamination by matching with the captured image.
The method of foreign matter inspection is the same even if it is not food. If you want to make discoveries from images by non-destructive inspection, it is probably easier to use microfocus X-ray CT. If the foreign matter is difficult for X-rays to pass through, there is a method of using neutron rays, but the equipment will be large. In any case, by acquiring a transparent image, processing it, and comparing it with a normal transparent image, it becomes possible to detect abnormalities such as foreign matter contamination and defects.
Basics of Image Processing
Now, in order to perform these inspections, it is necessary to process the images so that the necessary information can be easily obtained without using the acquired images as they are. First, "binarization" is used. This takes advantage of the brightness of what is in the image. Set a threshold, and the part with higher brightness is white (highest brightness, 255 for 256 gradations), and the part with a lower brightness is black (lowest brightness, 0 for all gradations). By binarizing, the area can be divided and extracted. If the result of the area extraction is different from the original assumption, it means that the part is missing.
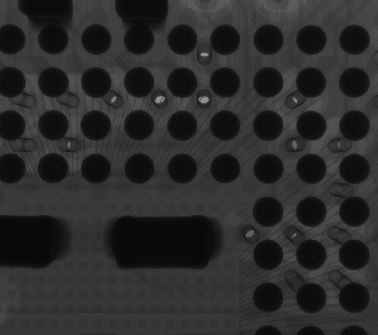
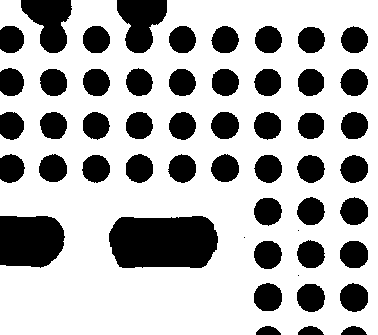
Example of Binarization (left: original, right: binarized)
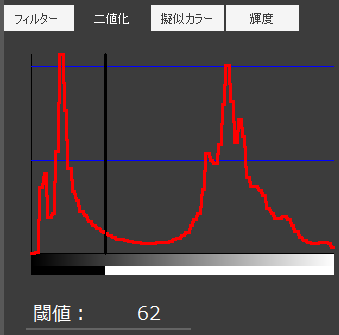
"Outline extraction" is an application example of binarization. If the target object is blackened by binarization, the outline can be obtained by tracing the pixel that hits the boundary with the white part. The procedure is as follows.
- (a) Perform a raster scan from the upper left of the image to find the pixel coordinates with a brightness of 0.
- (b) Number the surrounding pixels counterclockwise from the bottom left.
- (c) Identify the coordinates with the lowest number among the pixels with 0 brightness.
- (d) Repeat until the first pixel coordinates are returned.
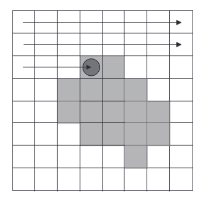
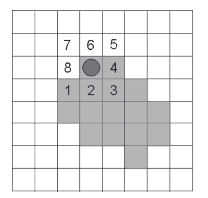
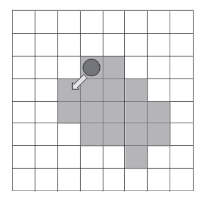
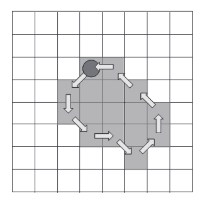
Contour Detection Method
By performing this process, you will be able to know the size, shape and number of samples to be inspected.
In the case of a grayscale image that is not binarized, a process called "edge detection" is performed. The only difference from contour detection is that the edge part is considered as "a part where the brightness changes rapidly". In other words, "contour detection" searches for coordinates with 0 brightness, but "edge detection" identifies coordinates with a large degree of change in brightness (large derivative value of brightness change) and does the same.
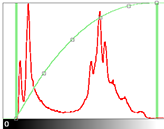
In order to perform edge correction, "gradation correction" may be performed. This includes "histogram equalization" and "Gamma correction (υ correction)". "Histogram equalization" is used when you want to increase the contrast, and "Gamma correction" is used when you want to adjust the brightness.
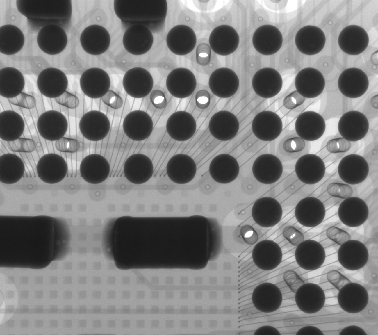
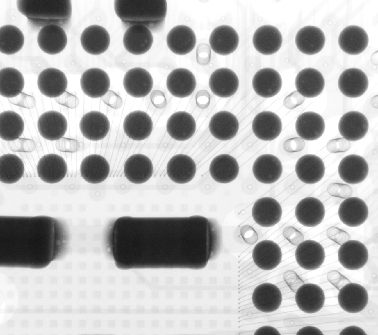
Until now, image processing was performed using one image, but there is also processing using two or more images. These are called "image-to-image operations". There are various processes such as addition, subtraction, multiplication, ratio, and superposition.
On the other hand, if the contrast of one image is low, or if the resolution is not sufficient for some reason, use "addition" or "superposition" to process it so that a clearer image can be obtained. It also leads to noise reduction.
For example, we use "subtraction" to find the difference between the first and second images. When subtraction is performed, the brightness is subtracted for the part that does not change, so the brightness becomes almost zero. On the other hand, since the brightness of the changed part also changes, the brightness does not become 0 as a result of subtraction.


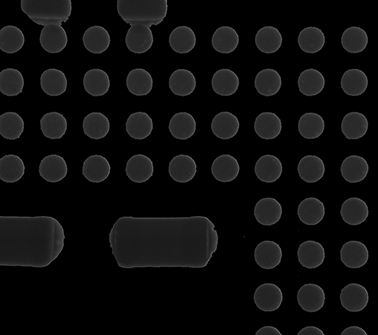
Example of Subtraction (Left: 1st image, Center: 2nd image, Right: subtracted)
The last item we would like to introduce is "Pseudo color". For example, consider a photo taken with an infrared camera. The photo below is a monochrome photo (Center) taken with infrared rays of a normal photo (Left). The brightness of the part where more infrared rays are emitted is higher. However, if it is left as it is, it is difficult to see the hot part, so the color is changed according to the brightness (Right). For example, white, yellow, and red are used in order from the hottest part, and blue and purple are used for the colder parts. Then, the hot and cold parts will be easier to understand. This is called a pseudo-color photograph.
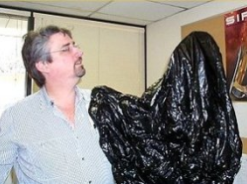
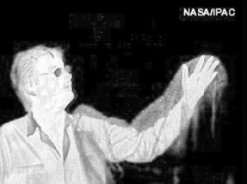
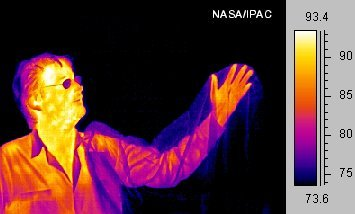
Pseudo-Color Example (Public Domain)
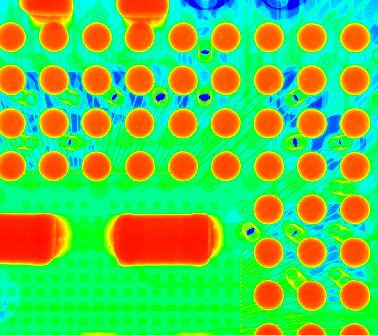
In this way, image processing is performed by combining various processes depending on what kind of information you want to obtain from images and how you want to show the information.
Related Technical Articles
- What is a Industrial CT? (Basic Knowledge)
- How to Take Beautiful X-ray CT Images? - X-ray Non-Destructive Inspection series (1) -
- Information Obtained from X-ray CT Images and How to View Them - X-ray Non-Destructive Inspection series (2) -
- FAQ: What is the tube voltage or acceleration voltage necessary for X-ray inspection systems?
- What is Non-destructive inspection? (Basic Knowledge)
Recommended products
Matsusada Precision's X-ray non-destructive inspection system can take high-definition and High-resolution images with its unique microfocus X-ray technology.
Reference (Japanese site)
- Japanese source page 「X線非破壊検査シリーズ③ 自動検査と画像処理」
https://www.matsusada.co.jp/column/x-xct3.html - 岐阜県保健環境研究所「食品中の異物検査法の構築」
https://www.health.rd.pref.gifu.lg.jp/kankoubutu/shohou/26/2018_26_foreign%20matter.pdf - 広島県「非破壊検査・異物分析」
https://www.pref.hiroshima.lg.jp/uploaded/attachment/119898.pdf - 非破壊検査と画像処理
https://www.jstage.jst.go.jp/article/tetsutohagane1955/70/9/70_9_1000/_pdf/-char/ja


