In aluminum die casting and other metal casting processes, Cavities may occur inside metal casting parts. The cavities created in casting and die casting are called "Shrinkage Cavities", "Gas Porosity," or "Blowholes" and are among the most common defects. Since casting holes results in defective products, it is necessary to determine the blowholes' location and size to take preventive measures. The shrinkage cavities cannot be visually inspected, and an X-ray system is needed for such shrinkage cavity inspections in aluminum casting.
Aluminum die castings have complex shapes, and it is difficult to determine whether they are cast cavities by X-ray radiographic images taken from a single direction. Therefore, an X-ray inspection system that can observe from many different directions is necessary. In addition, since aluminum die-cast is a metallic material and many samples are large, an X-ray tube with a high voltage is necessary.
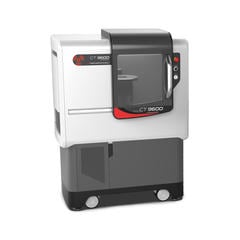
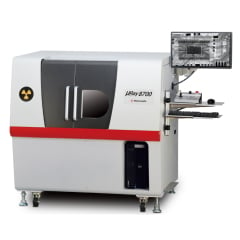
The horizontal model of our X-ray inspection systems has a turntable stage, so the workpiece can be rotated 360 degrees for observation simply by placing it on the object. The Computed Tomography (CT) imaging function is effective for more detailed shape observation. The ability to observe 3D images and cross-sectional images from three directions enables observation of internal structures that could not be seen without grinding or cutting, as well as dimensional measurement and comparison with design values by converting to Stereolithography (STL) data.
The horizontal X-ray inspection system μRay8700 is equipped with a 130kV microfocus X-ray tube and a high-resolution, large area 6-megapixel Flat Panel Detector (FPD), enabling wide-field, high-resolution X-ray radiographic images of Shrinkage Cavities in Aluminum Casting.

| Focal spot | Microfocus |
|---|---|
| X-ray tube voltage | 130 kV |
| Magnification | 1 to 100x |
Recommended products
Information on related articles in Technical Knowledge
- The Right Way to Choose appropriate X-ray Inspection System
- Principles of Radiography
- How to use X-ray Inspection System safely
- Computed Tomography (CT) Basic and Principle
- Non-Destructive Testing: Types and Applications
- What are X-rays? (Basic Knowledge)
- How to Take a Computed Tomography? - X-Ray NDT series (1) -
- How to View X-ray CT Images - X-ray Non-Destructive Inspection series (2) -
- X-ray Image Processing and Automated Inspection - X-ray Non-Destructive Inspection series (3) -
- What is the difference between Radioactivity, Radiation, and Radioactive Materials?
- Radiation Effects on the Human body and the safety of X-ray equipment


